 123456
Play a first bassline
Start the internal synth
Hear a phrase before connecting other gear.
- Open PATTERN, choose INTERNAL clock for standalone use, and press PLAY. In MIDI, keep LOCAL SOUND enabled when you want to hear JR ACID itself.
- Press GENERATE to create a phrase from the current generator settings. Press STOP to stop the sequencer.
- Turn CUTOFF counterclockwise for a darker tone. Turn it clockwise to open the filter. Increase RESONANCE to emphasize the filter frequency.
Result · The pattern triggers the built-in synth. A low cutoff, low output level or external-only MIDI setup can make a running pattern difficult to hear.
Make a new phrase and keep part of it
Generate variations without replacing the part you like.
- Open PATTERN → GENERATOR. Set the root, scale, density and other recipe controls before generating.
- Choose LOCK in the step row and mark the steps you want to preserve. Use the generator lock controls for the musical fields you want to retain.
- Press MUTATE to probabilistically change eligible material, or GENERATE for a new phrase under the recipe and locks.
Result · Unlocked material can change while the locked part is retained. A low mutation amount can make no change on a particular pass. Locks do not block direct manual note edits.
Edit notes, gates, accents and slides
Change a note directly
Put a specific pitch at a specific step.
- Open PATTERN → SEQUENCE. Select a step in the piano roll or the numbered step keys.
- Choose MOVE and drag the note to the desired pitch/position. Use DRAW to add material and ERASE to remove it.
- Use the page keys 1–16 / 17–32 / 33–48 / 49–64 to edit later steps. Select the sequence length to extend or shorten the active phrase.
- Use FIT to fit the visible pitch range. FOLLOW makes the display track playback.
Result · The played pitch or gate changes at that step. The visible pitch range can move as notes are edited beyond its edge.
Add articulation
Use the same notes with a different feel.
- Choose GATE and toggle a step to make it sound or remain silent. Use GATE % when you need note length.
- Choose ACCENT and mark a sounding step to apply accented articulation.
- Choose SLIDE on the required steps, then play the phrase to hear connected pitch movement.
- Choose DUCK to mark ducking steps. Set the global DUCK amount and REL for the depth/recovery of the dip.
Result · Gate determines whether a step plays. Accent changes articulation, slide connects pitch movement, and ducking creates a level dip. These are different step properties.
Work across patterns
Choose another stored phrase without changing the step page.
- The top A–H keys select pattern slots. The 1–16 / 17–32 keys below are pages inside a pattern.
- Select the required slot before editing or using the sequence operations.
- Use the available duplicate/copy operations for a variation, then edit that destination slot.
Result · Pattern selection and step-page selection are separate. Check the destination before replacing a pattern or loading a full patch.
Shape the synth and modulation
Change the filter response
Turn a static note into a moving acid tone.
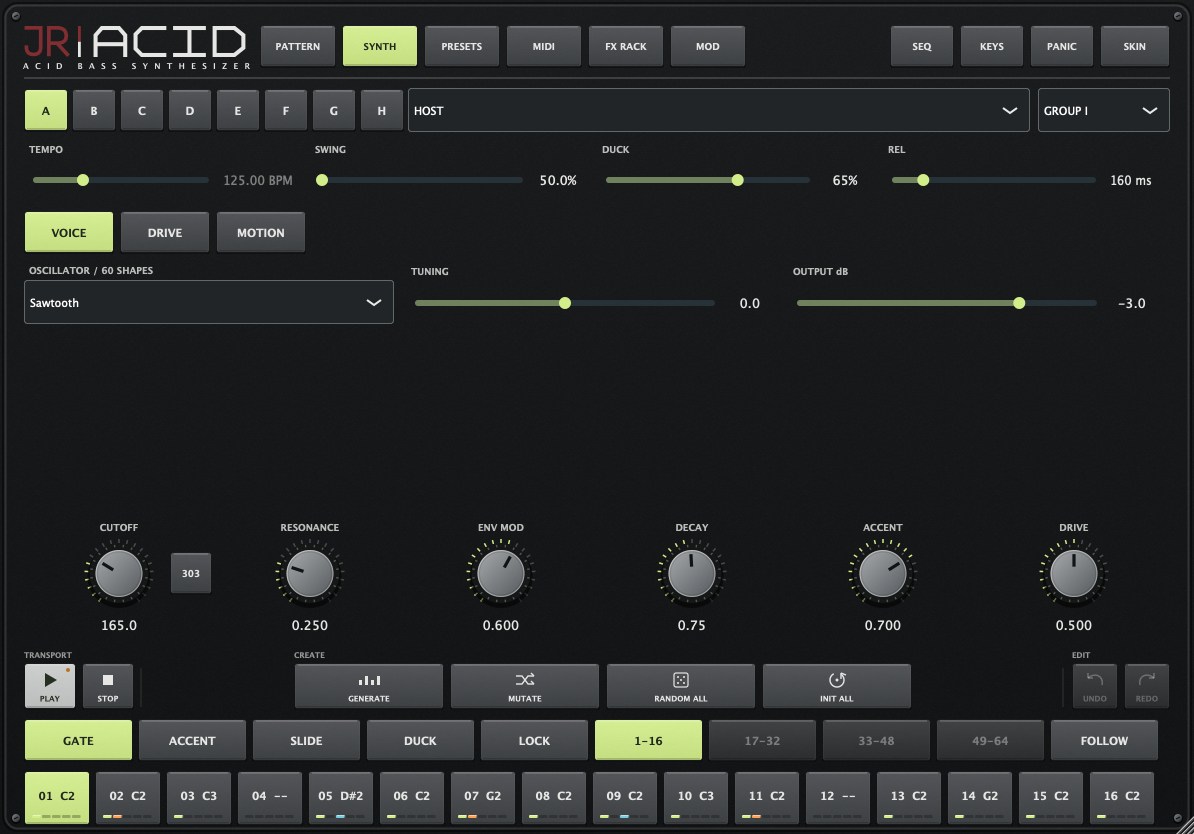
- Play a pattern, then use the six main performance knobs: CUTOFF, RESONANCE, ENV MOD, DECAY, ACCENT and DRIVE.
- Raise ENV MOD to make the envelope move the filter more. Increase DECAY to extend that movement.
- Raise ACCENT to increase the accented-step effect, then add DRIVE for more nonlinear character.
- Open SYNTH for oscillator, tuning, voice/filter and other sound controls.
Result · Cutoff sets the base brightness; resonance emphasizes the cutoff region; the envelope adds movement around it. Compare at a moderate output level while changing drive.
Modulate a parameter
Make a control move repeatedly while the phrase plays.
- Open MOD and choose LFO1, LFO2 or LFO3.
- Choose a DESTINATION and shape. Set a clock mode/rate or synced division, then raise DEPTH.
- Try CUTOFF as the destination first. Adjust rate/division for slow sweeps or faster rhythmic movement.
- Set depth back to zero or use LFO OFF when you want to compare the static setting.
Result · The chosen destination follows the LFO. If nothing changes, check depth, destination, clock/transport and whether a playable sound is reaching the output.
Use FX RACK
Add an echo to the line
Repeat the synth output at a timed interval.
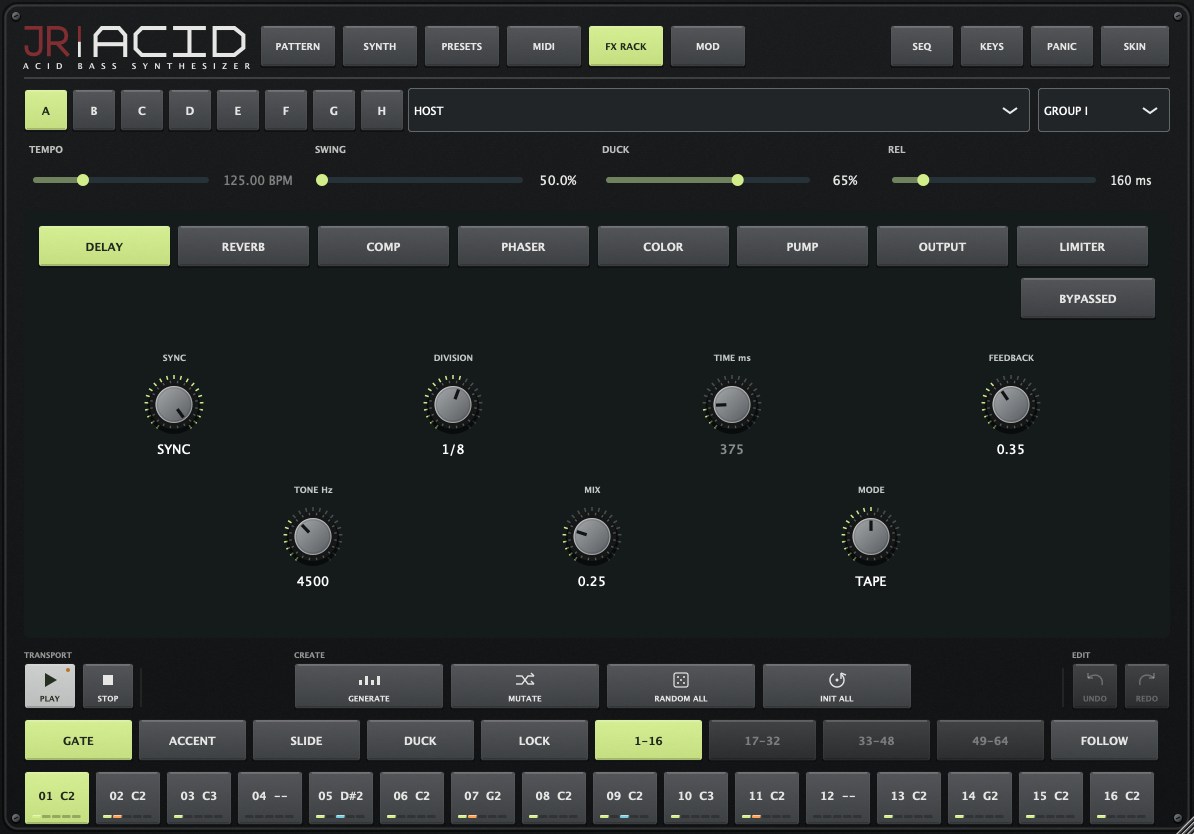
- Open FX RACK → DELAY and enable that module if the panel says BYPASSED.
- Enable SYNC and choose DIVISION for beat-relative repeats, or use TIME in free timing.
- Raise MIX until repeats are audible. Raise FEEDBACK to keep them repeating for longer.
- Set COLOR/TONE and the available mode controls for the desired repeat character. Bypass DELAY to compare.
Result · Delay adds repeats after the voice. Feedback controls their persistence; mix controls how much delay you hear.
Control the finishing stages
Add space or dynamics without changing the notes.
- Select REVERB, COMP, PHASER, COLOR, PUMP, OUTPUT or LIMITER inside FX RACK.
- Enable only the module you want to adjust, turn its displayed controls, and compare with bypass.
- Keep output gain moderate while combining drive, compression and limiting.
Result · The sequence notes remain the same while the audio is processed. MIDI sent to an external instrument does not automatically include the sound of these audio effects.
Load and save sounds or phrases
Load a sound without replacing the phrase
Audition patches through the notes you already made.
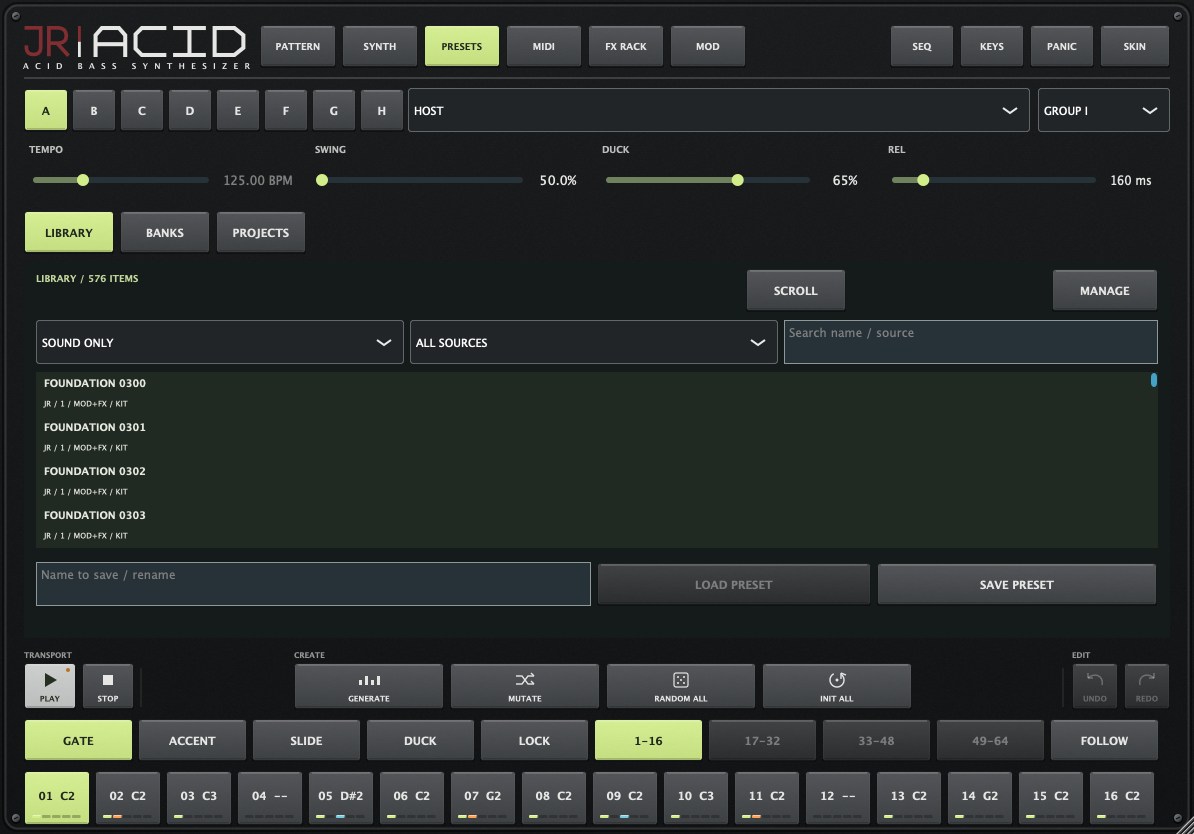
- Open PRESETS → LIBRARY. In the load-mode selector choose LOAD: SOUND ONLY.
- Select an entry, then press LOAD PRESET.
- Use LOAD: PATTERN ONLY to replace just the sequence, or LOAD: SOUND + PATTERN when you want both.
Result · SOUND ONLY keeps the phrase while changing the patch. A full sound-and-pattern load intentionally replaces both.
Save a named project
Keep an editable session in the local project library.
- Open PRESETS → PROJECTS. Enter a project name, then tap SAVE AS NEW to create a separate .jracid project.
- After editing, tap SAVE to update the current project. If no project is selected, SAVE creates a new one.
- Select a project in the list and tap OPEN to restore it. Opening first saves a recovery checkpoint; a checkpoint failure cancels the open operation.
- Use CHECKPOINT before an experiment. RECOVER restores the checkpoint. Save a separate named project when you want a lasting alternative.
Result · The project contains editable app state. SAVE updates the current project; SAVE AS NEW makes another file. A checkpoint is a recovery copy, not continuous autosave.
Move a session or MIDI file
Choose a file format according to what you want to keep.
- Use SAVE SESSION to export a portable .jracid file through Files. Choose a destination and finish the system save dialog.
- Use LOAD SESSION to restore a .jracid file. A valid session can replace the current state, so save your current work first.
- Use EXPORT MIDI for the selected pattern and its supported patch data. IMPORT MIDI loads supported MIDI data into the selected bank/slot.
- For an audio recording, load JR ACID in an AUv3 host and record or render the instrument track in that host.
Result · A .jracid file preserves editable app state; MIDI carries supported events and patch data. MIDI does not contain the synth audio. This standalone version has no WAV export button.
External MIDI and AUv3
Drive another instrument
Send the phrase out instead of using only the local synth.
- Open MIDI, select the output port/channel and choose NOTES, CLOCK/TRANSPORT or NOTES + CLOCK for your setup.
- Choose CLASSIC MONO / 303 articulation or the generic CC/program mode to suit the destination.
- In MIDI, turn LOCAL SOUND off if you want only the external instrument. Check the receiving device’s channel and audio output.
- Leave THRU off unless you need it. Avoid sending clock/MIDI back into the same route.
Result · The destination receives supported notes/clock/controls. You still need an audio path from the external instrument to your speakers or host.
Use JR ACID in a host
Keep the synth with your host project.
- Load JR ACID as an AUv3 instrument in a compatible host, then route its audio to the main output.
- Use host transport/tempo for a synced sequence, or send MIDI notes to play the synth directly.
- Save the host project to preserve the instrument state.
Result · The host controls the project and audio routing. Incoming MIDI can play the synth even when host transport is stopped.
Skins and support
Change the interface
Choose a surface without changing the phrase or sound.
- Tap SKIN in the top bar and choose one of the Modern or JR entries.
- Modern BK is the default for a new instance. An explicitly saved selection remains available; the list shows Modern before JR.
- Open ABOUT for the included notices. For a problem report, include version/build, device/OS, host, route and reproducible steps.
Result · Skins change the presentation. Use PRESETS and the sound controls when you want a different patch.
Included skins
| Skin | Surface |
|---|---|
| Modern BK | Black panel. Lime accents. |
| Modern | Graphite hardware with smooth type. |
| Modern Light | Light grey with a soft metal feel. |
| Modern Yellow | A warm yellow hardware panel. |
| Modern Red | Deep red with lime highlights. |
| Modern Purple | Muted purple with lime highlights. |
| JR | Ivory pixels and a green LCD. |
| JR 303 | Vintage ivory pixels. Amber LCD. |
Resolve silence and preserve an idea
A running sequence makes no sound
Check clock, notes, local audio and destination in that order.
- For standalone playback choose INTERNAL clock and press PLAY. For host sync, start the host transport. An external clock setting needs a running external master.
- Check that the pattern has enabled gates. Open CUTOFF gradually and check the output level. A playhead can move while every step is a rest or the filter is nearly closed.
- Open MIDI and check LOCAL SOUND. When it is off, outgoing MIDI can still drive another instrument, but JR ACID’s own voice is silent.
- For an AUv3 instrument check the host audio route and track mute/solo. For external MIDI check the receiving channel and the external instrument’s separate audio connection.
Result · You distinguish a stopped clock, silent notes, a muted local voice and a missing output route without replacing your patch.
Generate without losing a phrase
Use a saved copy and locks for different jobs.
- Save your current work with PRESETS → PROJECTS → SAVE AS NEW before experimenting.
- Use LOCK and the generator field locks to preserve selected material during GENERATE/MUTATE. Direct note edits can still change it.
- Use UNDO after an unwanted edit. For a deliberate recovery point use CHECKPOINT and later RECOVER.
- When auditioning another sound over your phrase, select LOAD: SOUND ONLY before LOAD PRESET.
Result · A named project is a separate saved version; locks constrain generation; SOUND ONLY preserves the current phrase while changing the patch.